Detailed plans now available
Build your own melting furnace! Melt and pour aluminum! Due to an overwhelming response to my improved foundry furnace, I have made available DETAILED PLANS that you can purchase and instantly download for a small fee
You get 52 pages of instructions, CAD drawings, photos, time-saving parts
checklist, suppliers list, step-by-step construction notes, and all the
FAQ’s, in printer-friendly pdf format!
…or, you all are welcome to browse the (as always: free) photo gallery of this project below. Enjoy!
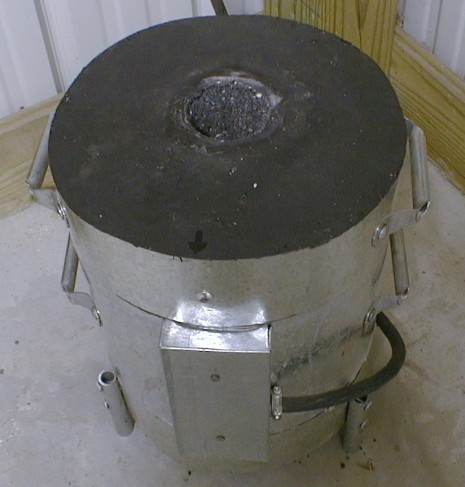
This is a homebuilt electric melting furnace. For my 25th birthday, my
wife got me Dave Gingery’s book “Lil Bertha, a Compact Electric
Resistance Shop Furnace.” So I started right off building by Dave’s
plans…
The main problem, in my opinion, that one encounters
in making a resistance furnace is the structure that holds the elements
in place. Dave’s book describes one solution to the problem, and that
is to form grooves in castable refractory.
My attempt at
forming the grooves by Dave’s designs failed miserably. The refractory
that was suggested in the book was AP Green’s Kastolite castable
refractory, and after ordering and having shipped about a hundred
pounds I got right to work. (Can you say ‘UPS charges’ 10 times really
fast? Thank you. Now you feel my pain.)
Well, when I tried to
pull the rubber hose out of the newly formed groove, the Kastolite
chipped and broke out horribly. The element barely stayed in place in
this malformed groove, but hey, I was following the instructions.
To make a long story short, I used the remaining Kastolite to make some
‘donuts’ with a little trough around the inside diameter, at the top.
The inside of these donuts was the inside diameter of the furnace, and
when stacked one ontop of another, nice, well-formed element grooves
resulted. However, the making of these ‘donuts’ required some styrofoam
cutting to make forms, and that’s another story…
This method of forming the element grooves worked well indeed, and the
Lil’ Bertha was up and running at last. After a few melts, I discovered
the great benefits of using electricity for melting. (I had indeed
tried gas burners, but they were noisy, required close supervision,
drank fuel like Coca-Cola on a hot day in the desert, and held the
temperature about as steady as a roller coaster.)
The Lil’
Bertha was a great success. I made a good many melts with ‘er. However,
the Kastolite began crumbling from the many heats. (An AP Green
technical support rep told me that Kastolite was intended as a backup
lining, and that I should have used Mizzou!) Well, the original Lil
Bertha finally went south, so the rest of this page is devoted to the
process of producing the New and Improved Lil’ Bertha!
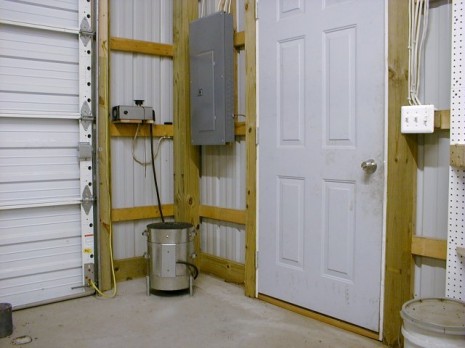
Another improvement that I made to the melting furnace is the
controller. Instead of using a range control mounted right on the
furnace body, I designed a beefed up version of a lamp dimmer and
mounted it up away from the heat of the furnace. As you can see in this
photo, the furnace and its controller are located in a corner of my
shop next to the electrical panel.There are a quite a number
of improvements to be made to the original Lil’ Bertha design. If you
are considering building this furnace for your shop, you may be able to
benefit from one or more of these improvements that I found useful.
There are two that I consider the most significant: 1. Using hard
firebrick for the furnace interior and 2. Making your own castable
refractory with high temp mortar and perlite.
Making grooves in firebrick is not as much a problem as first expected.
I took three abrasive fiber masonry cutting saw blades and mounted them
like a stack on my table saw arbor. I tilted the arbor to 30° and
raised the stack of blades so they made about a 5/8″ deep cut.
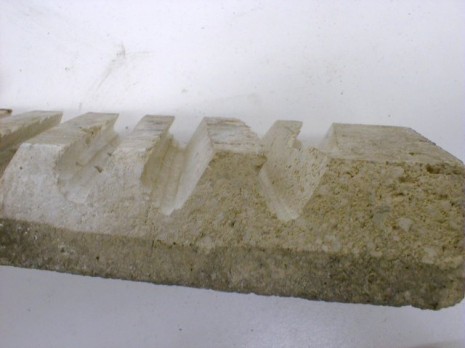 Detail of grooves in firebrick
Since the furnace was to use 6 firebricks in a hexagon, five
straight-grooved bricks were made and one with angled grooves. When
cutting the grooves, I cut each groove on all the bricks before making
adjustments to the fence, and spaced the grooves on exactly one inch
centers. The angled-groove brick serves as the terminal brick.The firebrick dimensions are 4 1/8″ x 8 1/4″.
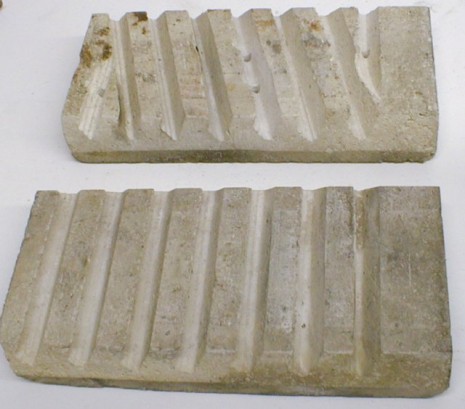 A straight-grooved
and an angled-grooved
firebrick for the
terminals
In making the bevels on the edges of each brick, it took some extra
attention to the angle needed to correctly align the ends of the angled
grooves with the straight-grooved bricks.Note how the path
formed by the grooves in the bricks resemble the ramps in a big-city
parking deck! This allows a single element to be used, spiralling from
top to bottom.
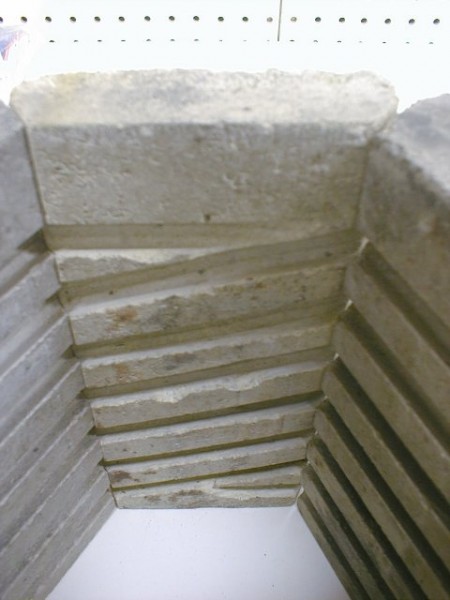 How the grooves in
terminal brick align
I used long hose clamps to solidly clamp the six firebrick together.
These clamps were left in place around the bricks and the refractory
rammed in around them.
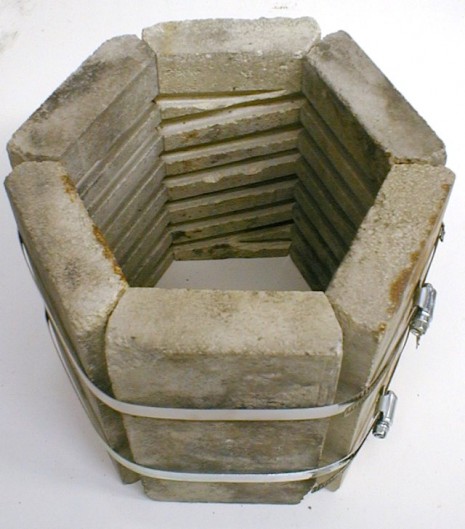 Firebrick clamped
together in a hexagon
For the furnace body I used readily available galvanized 26 guage
heating/cooling air duct pipe. The furnace is 12 inches in diameter,
and so it used two 6″ pipe sections snapped together parallel to each
other to make one 12″ round shell. I put srews and nuts through right
at the seams to keep them from popping apart.The wooden formers were handy to keep the furnace body nice and round while ramming in the refractory.
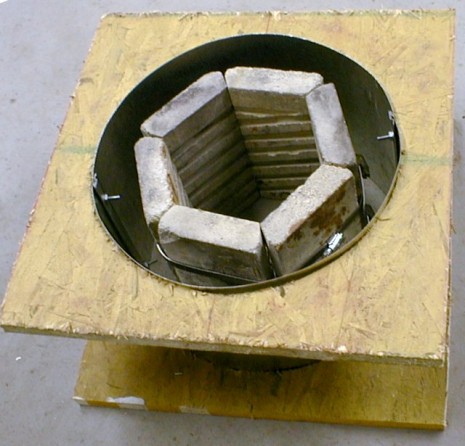 Wooden formers in place,
ready for refractory
I wish I had discovered this very simple and durable formula sooner! I
got the perlite at a local Wal-Mart, and the Worcester Brush High Temp
Furnace Cement at a hardware store.The recipe is very simple,
it’s just a 4 to 1 mixture, using 4 quarts of perlite to 1 quart of
cement. I used two types of cement, the black 3000°F and grey 2700°F.
There was quite a difference, and I recommend using the black stuff, it
thins a lot better and is smoother.Complete details of this do-it-yourself formula are available at John Wasser’s Coffee Can Foundry site.
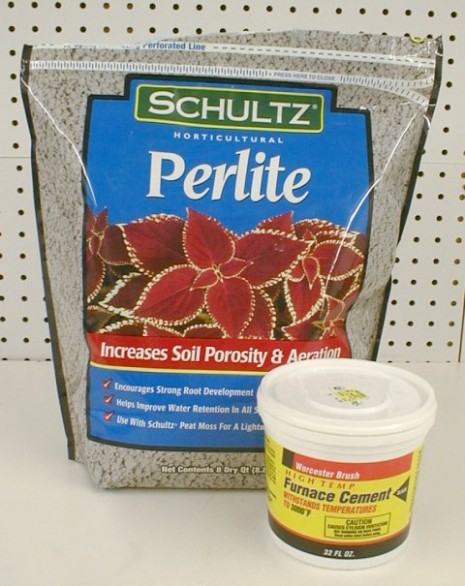 All you need to make
your own lightweight
castable refractory
The refractory compresses a fair bit as its rammed in, so I had to be cautious not to ram it too hard.
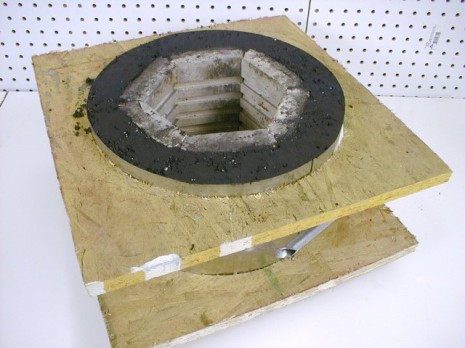 Rammed full of home
made refractory
The handles are garage door lift handles, and I attached them with the
long carriage bolts that came with them. Also, I put two extra carriage
bolts in, so there’s extra reinforcing support for the refractory
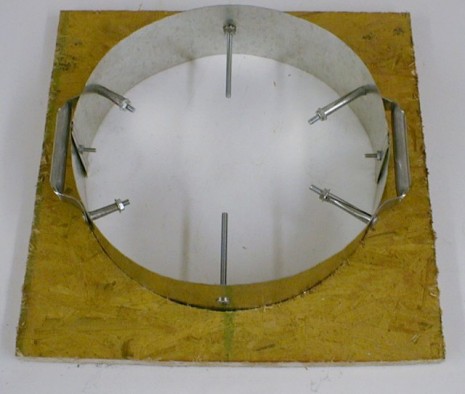 Furnace lid before
filling with refractory
The legs are 1/2″ galvanized water pipe.
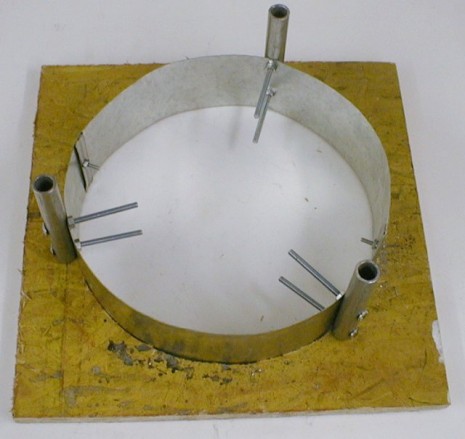 Three-legged furnace base
before filling.
Similar to the lid, the mounting hardware is left long, extending into the space that will get rammed full of refractory. This is especially important here because the weight of a full crucible rests in the center of the base.
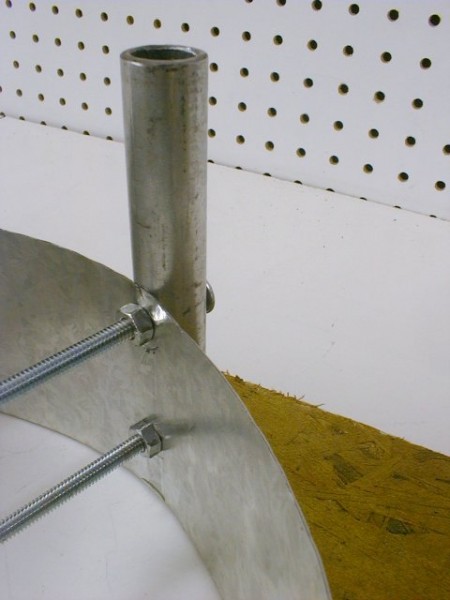 Leg mounting hardware
is also refractory support
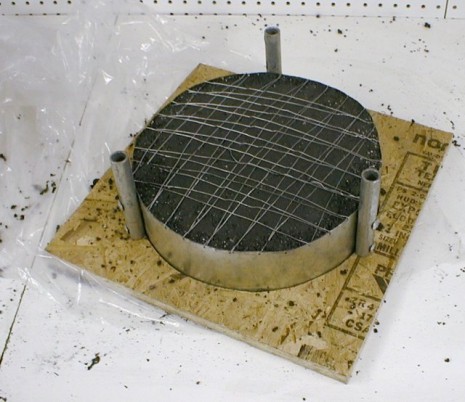
After having the bottom of the furnace base fall out several times
before it was fully cured, I decided it was time to devise a way to
support the very bottom of the base.So a series of 1/16″ holes
were drilled all the way around the bottom edge of the base, and a
pattern of wires woven so that there were no more than an inch square
of unsupported refractory in any area. This solved the problem and also
provides extra insurance against failure of the base under the weight
of a full crucible.
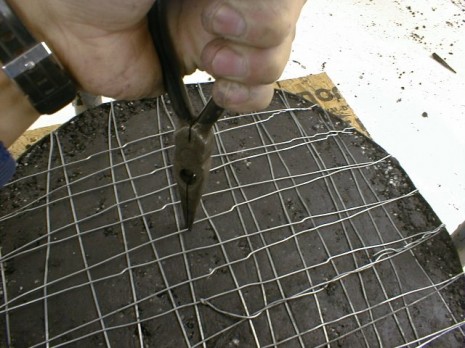 Making the refractory
support wires tight
This gives a better view of the base section with its supporting wires.
The home-brew refractory steams a LOT while it’s being cured, and this
can cause it to soften and stick the sections together. So a liberal
amount of baby powder (talc) was applied to the base first. It’s
probably still there.
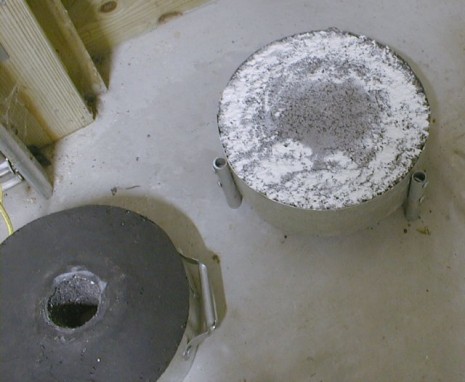 Preparing to fire the
base and lid
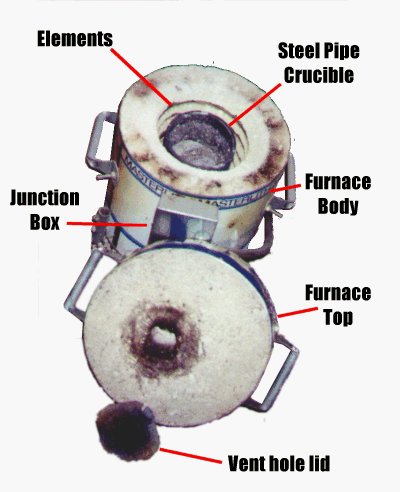
The vent hole was formed when the lid was rammed up. I used a 6 oz.
dixie cup, rammed full of refractory (simply for support) to form this
hole. (Note the tapered sides of the vent hole.) The dixie cup was
removed after a few days of air drying.
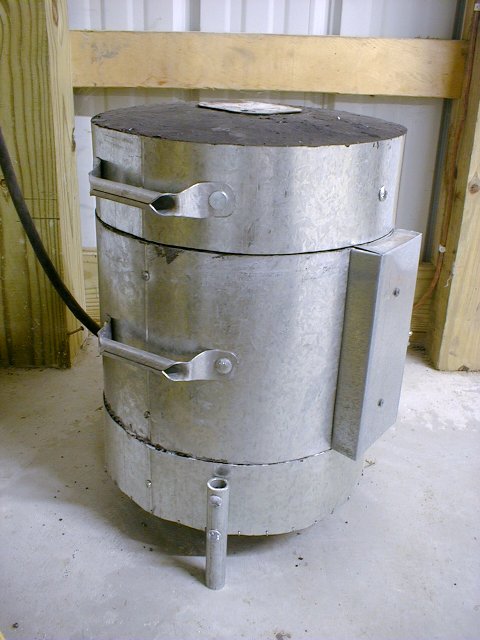
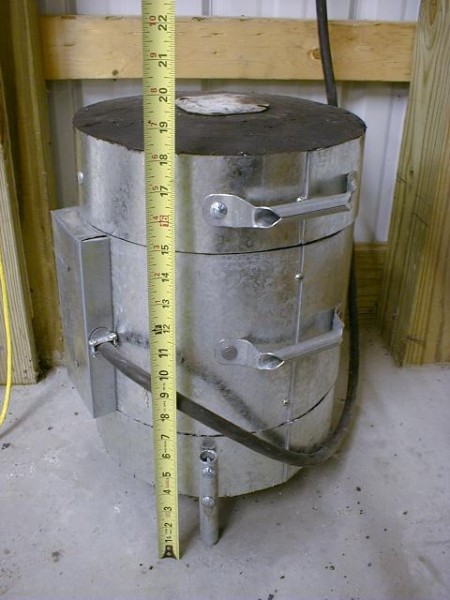
Furnace measures a mere 18″ tall and will handle a two quart crucible.The handles are ordinary inexpensive garage door lift handles.
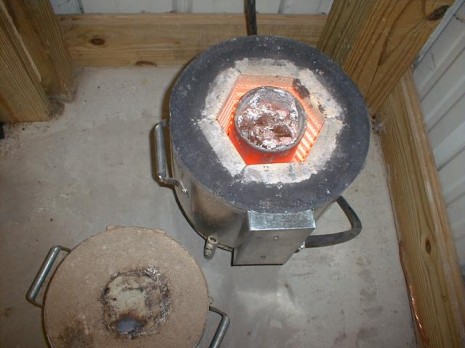
In this picture, I’m using the base and lid from the original Lil’
Bertha while air drying the new base and lid. Also, the new furnace has
a slightly deeper and bigger diameter chamber, so a larger crucible can
be used.Now you can purchase and download plans to build your own melting furnace!
